Gluten-Free Peanut Butter Blossom Cookies
December 5, 2023While these peanut butter blossoms are most popular during the holiday season, they make an excellent treat any time of the year! With just a few ingredients, this recipe is definitely easier than pie.
Recipe provided by our friends at the Gluten-Free Palate.

Ingredients
- 1 cup peanut butter
- ½ cup granulated sugar, plus a bit more for rolling cookies in
- ⅓ cup brown sugar
- 1 egg
- ¼ teaspoon salt
- 1 teaspoon vanilla extract
- 24 Hershey’s Kisses, unwrapped (or your favorite chocolate pieces, like Reese’s—just be sure to read the label and ensure it’s gluten-free! )
Instructions
- Add peanut butter, both sugars, egg, salt, and vanilla extract to a medium mixing bowl.
- Mix until combined, then chill for 1 hour.
- Preheat oven to 350°F (180°C). Line two baking sheets with parchment paper.
- After chilled, roll cookie dough into 1″ balls. Roll them in granulated sugar.
- Place on the baking sheet 2 inches apart and bake for 8-10 minutes or until the bottoms start to brown.
- Remove from the oven and immediately place kiss, or your favorite chocolate, on top and press down slightly.
- Store in an airtight container for up to 4 days.
TAGS: HOLIDAY, DESSERT
Gluten-Free Gingerbread Cookies
Gingerbread, a holiday classic! Use this gluten-free recipe, courtesy of our friends at the Gluten-Free Palate, to make celiac-safe gingerbread houses and gingerbread people. Decorating the cookies will be almost as enjoyable as eating them!

Ingredients
Gingerbread dough
- 3 cups 1 to 1 gluten-free flour
- 2 teaspoons ground cinnamon
- 2 teaspoons ground ginger
- ½ teaspoon ground cloves
- ½ teaspoon ground nutmeg
- ¾ teaspoon baking soda
- ½ teaspoon salt
- ¾ cup butter, room temperature
- ½ cup brown sugar, packed
- 1 egg
- ½ cup molasses
- 2 teaspoons vanilla extract
Icing
- 2 cups powdered sugar
- 3 Tablespoons milk
- ½ teaspoon vanilla extract
Instructions
- Mix the flour, spices, baking soda and salt in a medium mixing bowl; set aside.
- In a large mixing bowl, cream butter and brown sugar together.
- Add in the egg, molasses, and vanilla extract. Cream until smooth.
- Add in half the flour mixture and mix until combined.
- Add in the remaining flour mixture and continue to mix until combine.
- Shape dough into a ball and divide in half.
- On a piece of parchment paper, pat the dough down into a 1-inch disk. Repeat with the other half of the dough.
- Refrigerate for 1-2 hours, or until cold and firm.
- Once the dough has chilled, remove it from the refrigerator and place a piece of wax paper on top. Using a rolling pin, roll dough out to ¼ inch thickness.
- Preheat oven to 350°F (180°C).
- Remove the wax paper from the top of the dough. Using cookie cutters, cut shapes into the dough. Use a spoon or butter knife to remove the extra dough from around the shapes. Roll extra dough back into a ball, and place the wax paper back on top, and roll into ¼ inch thickness. Repeat until all dough is used.
- Transfer the parchment paper with the gingerbread cookies onto a baking sheet.
- Bake for 8-10 minutes, or until the edges are firm and the centers are set. Remove from the oven and cool to room temperature.
- Make the icing: mix all ingredients in a small mixing bowl until smooth. Spoon icing into a piping bag with a small tip.
- Decorate cooled cookies with icing and, if you have them, gluten-free sprinkles or candies.
- Let the icing set for a couple of hours before storing. Store in an airtight container at room temperature for up to 4 days.
TAGS: HOLIDAY, FOR KIDS, DESSERT
Samosas
October 31, 2023Samosas are savory, fried pastries from South Asia, suitable as appetizers or a main meal. Try this mouth-watering veggie version, and once you get the hang of it you can customize the filling with whatever ingredients you want!
This recipe is provided courtesy of our friends at the Gluten-Free Palate.

Ingredients
Filling
- 1½ pounds medium potatoes, peeled and cut into ½-inch chunks
- 1 Tbsp olive oil
- 2 tsp butter
- ¼ tsp cumin
- ½ tsp fennel seeds
- 1 Tbsp curry powder
- ½ tsp cayenne powder
- ¼ tsp ground turmeric
- 1 tsp garam masala
- 1 tsp ginger paste
- 1 onion finely chopped
- 2 cloves garlic, finely minced
- 4 oz thawed peas
- 1 carrot, shredded
- 1 tsp salt
- 1 tsp pepper
- 1 Tbsp lemon juice
- ¼ cup water
- 2 Tbsp chopped cilantro
- Oil for frying
Pastry
- 3 cups gluten-free plain flour (ie, doesn’t include xanthan gum, baking powder, yeast, etc.)
- 2 tsp xanthan gum
- 1 tsp baking powder
- 1 tsp salt
- 1 egg
- 4 Tbsp olive oil
- 1-1 ½ cups warm water
Dipping Sauce
- 1 tsp oil
- 1 clove garlic, finely minced
- 1 Tbsp concentrated tamarind paste
- ¼ cup hot water
- ½ tsp salt
- ½ tsp cayenne powder
- 1 Tbsp brown sugar
- ½ tsp ground cumin
Instructions
Filling
- Boil the potatoes until just tender, about 15 minutes. Drain and set aside.
- Heat a large wok over medium to low heat. Add olive oil and butter.
- Add cumin, fennel seeds, curry powder, cayenne powder, ground turmeric, masala, and ginger paste. Saute until fragrant.
- Add garlic, and saute again for a few minutes.
- Add onion until translucent and fragrant.
- Add thawed peas and shredded carrot. Cook until tender.
- Add boiled potatoes to the wok. Add salt, pepper, lemon juice, and water. You may add salt and pepper according to your liking.
- Add the coriander and cook for a few minutes
- When all the filling is cooked, remove it from the heat and allow it to cool.
Pastry
- In a large bowl, mix gluten-free plain flour, xanthan gum, baking powder, and salt.
- Add egg and olive oil. Mix them until become the dough becomes crumbly.
- Add warm water little by little. Then knead until it becomes smooth. Knead lightly to bring it together as a ball. Remember, there’s no gluten, so not much kneading is required.
- Cover with plastic wrap and rest for 30 minutes.
Assemble the Samosas
- Divide the dough into 8 parts on a floured flat surface. Roll one part of the dough out to a 6 inches round. Cut in half, diagonally.
- Working with one of the two cut pieces, lightly wet the straight edge you just cut.
- Fold 1 edge to the other over your finger, so it becomes a cone, and pinch them to seal.
- Hold it on your hand and fill it with 1 spoonful of samosa filling.
- Close them by folding the round side and pinching to seal.
- Repeat the process with the rest of the dough.
Dipping Sauce
- Heat oil in the saucepan. Add garlic and saute.
- Add tamarind paste, hot water, salt, chili powder, brown sugar, and ground cumin. Cook until thickened.
Cook the Samosas
- Fry a few at a time, turning every few minutes, until crispy and golden, about 8-10 minutes.
- Use a slotted spoon to transfer fried samosas to a platter lined with paper towels.
- Serve hot with dipping sauce.
TAGS: VEGETARIAN, SIDE DISHES, LUNCH, DINNER, APPETIZERS/SNACKS
Orange Chicken
October 4, 2023Missing perfectly glazed orange chicken from your local takeout place? Yearn no more! We have a perfect, gluten-free substitution recipe, provided by our friends at the Gluten-Free Palate.

Ingredients
Sauce
- Zest from 1 orange
- 1 cup orange juice from 1 orange (use the orange you zested)
- ⅓ cup granulated sugar
- 2 tablespoons rice vinegar (or white vinegar)
- 3 tablespoons gluten-free soy sauce or tamari
- ½ teaspoon ground ginger
- ½ teaspoon garlic powder
- 1 tablespoon cornstarch
- 2 tablespoons water
Chicken
- 4 skinless chicken breasts cut into 1-inch pieces
- 3 eggs, whisked
- ½ cup all-purpose gluten-free flour blend
- ½ cup cornstarch
- oil for frying, ideally one with high smoke point oil, like avocado oil
Instructions
Sauce
- Add orange juice, sugar, vinegar, gluten-free soy sauce, ginger, and garlic powder to a large pot or wok, and heat over medium heat for 3-5 minutes.
- In a small mixing bowl, whisk 1 tablespoon of cornstarch with 2 tablespoons of water to form a paste. Add the paste to orange sauce and whisk together.
- Continue to cook for 5 minutes, until the sauce begins to thicken.
- Once the sauce is thickened, remove from heat and add the orange zest. Stir until combined; set aside.
Chicken
- Add the gluten-free flour and cornstarch to a shallow dish and stir to combine.
- Whisk eggs in separate shallow dish.
- Dip chicken pieces in egg mixture, coating all sides, and then in the flour mixture, coating all sides. Place on a separate plate. Repeat until all chicken is coated.
- Heat 2 -3 inches of oil in a heavy-bottomed pot over medium-high heat. If it starts to smoke, turn the heat down.
- Working in batches, add chicken pieces to the pan, but don’t overcrowd the pan.
- Cook for 3-4 minutes, turning halfway through, until the chicken is brown on all sides and cooked through.
- Place the cooked chicken on a paper-towel-lined plate and repeat until all chicken is cooked.
- Once all the chicken is cooked, add the chicken to the large pot with the orange sauce and toss to coat.
- Serve hot over rice.
Notes and Tips
- Make the sauce first, so it’s ready to go when the chicken is done.
- Breast meat and thigh meat both works well in this recipe.
- You can use chicken strips or smaller pieces of chicken.
- If you don’t have cornstarch, you can use arrowroot starch or tapioca starch.
- The oil temperature should be around 350F.
TAGS: LUNCH, DINNER
Peach Crisp
August 1, 2023If you’re taking advantage of peach season in late July or early August, use fresh peaches for this recipe! Otherwise, substitute canned or frozen peaches. This is the perfect treat to sweeten up a hot summer night, or bring to any gathering, any time of the year, to cap off a hearty meal.
This recipe is provided courtesy of our friends at the Gluten-Free Palate.

Ingredients
Peach filling
- 5 cups fresh or frozen and thawed peach slices (about 8 medium-large fresh peaches)
- ¼ cup granulated sugar
- 2 Tablespoons cornstarch
- 1 teaspoon vanilla extract
Crisp topping
- ¾ cup brown sugar, packed
- ½ cup all-purpose gluten-free flour blend
- ½ cup gluten-free quick oats (make sure they are gluten-free, or substitute chopped nuts, such as slivered almonds or chopped pecans)
- 1 teaspoon ground cinnamon
- 1 teaspoon ground nutmeg
- ⅓ cup butter, softened
Instructions
- Preheat oven to 375°F (190°C) and position the oven rack in the center of the oven. Lightly spray or grease an 8x8x2” square baking pan.
- Make the peach filling: Add the peaches, sugar, cornstarch and vanilla extract to your prepared pan. Stir until combined.
- In a separate, medium mixing bowl, combine the brown sugar, flour, oats, cinnamon, and nutmeg.
- With a pastry blender or two forks, cut the butter into the flour mixture until it resembles coarse crumbs.
- Evenly sprinkle the topping over the peach filling.
- Bake for 25 minutes or until the topping is golden brown.
- Serve warm with vanilla ice cream or whipped cream. It’s best the day of, but can be stored at room temperature for up to two days.
TAGS: DESSERT, VEGETARIAN
Homemade, Gluten-Free Pasta (no machine needed!)
July 3, 2023Are you missing perfect, slightly chewy pasta on the gluten-free diet? Then read on for a simple recipe for delicious, gluten-free pasta! You’ll be making fancy, authentic noodles in no time.
If you have a pasta machine, use it to make a more consistent noodle shape. Otherwise, don’t worry! Your pasta will be equally tasty if you hand cut it.
This recipe is provided courtesy of our friends at the Gluten-Free Palate.

Ingredients
- 1 ½ cups all-purpose gluten-free flour
- 2 teaspoons xanthan gum (only if your flour doesn’t contain it)
- 3 large eggs
Instructions
- In a large bowl, mix the flour with the xanthan gum, if using.
- Make a well in the middle of the flour and add the eggs. Mix well using a fork until all the ingredients are combined and you have a slightly sticky pasta dough. If the dough feels too dry you can add one more egg or a couple tablespoons of water until you reach the desired consistency. If the dough is too wet, add a little bit more gluten-free flour.
- Knead the dough on a floured surface for 2-3 minutes until you get a smooth ball of dough. There’s no gluten to be formed so you don’t need to knead the dough for too long, but the kneading ensures that you break apart lumps of flour, if any exist.
- Cut the dough into quarters and roll it out one at a time with a rolling pin. Roll it out into a loose rectangular shape.
- Fold the long ends together (so it’s easier to cut, unless you’re using a very long knife. You could even fold it in thirds). Then slice the dough with a knife according to how thick you want your pasta to be. Unroll or unfold your dough, then toss the pasta strands in some flour and shape them into nests (pictured). You can let the pasta dry, or you can cook it right away in salted, boiling water for 4-8 minutes.
- Top your noodles with your favorite gluten-free sauce and serve!
TAGS: VEGETARIAN, LUNCH, DINNER, DAIRY-FREE
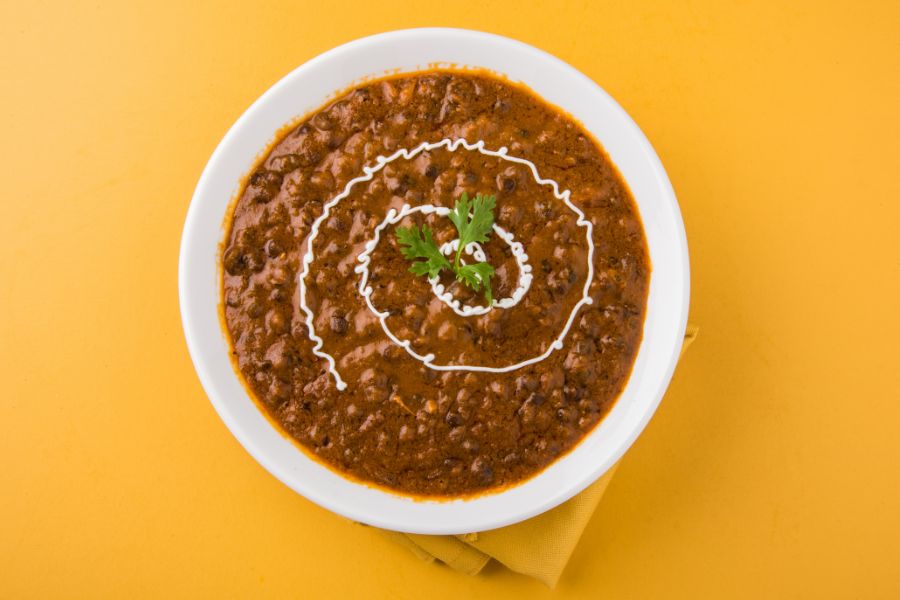
Dal Makhani (Indian lentils)
May 31, 2023Looking for a delicious Indian recipe? Try this gluten-free, vegetarian dish, full of protein and flavor! Serve with basmati rice for a full meal.
This recipe is provided courtesy of the Gluten-Free Palate.
Ingredients
- 1 onion chopped
- 1 cup urid beans (black lentils)
- ⅓ cup canned red beans
- ⅓ cup canned black beans
- 1 chopped tomato
- 1 Tbsp butter
- ¼ cup cream
- 3 cups of water
- ⅕ tsp cumin
- ⅕ tsp granulated garlic
- ⅕ tsp chili
- ⅕ tsp ginger
- ⅕ tsp turmeric
- ⅕ tsp fenugreek
- ⅓ tsp garam masala
- ½ tsp salt
- ⅕ tsp pepper
- cilantro for serving
Instructions
- Pre-soak urid beans for 5-6 hours. This will shorten their cooking time.
- In an Instant Pot or pressure cooker on saute mode, fry the onion in butter for 4-5 minutes, stirring occasionally.
- Add urid beans, tomatoes, salt, and all spices except garam masala and pour in 3 cups of water. If you are using raw beans instead of canned beans, add them at this stage.
- Stir and cook under pressure for 30 minutes. Then gently release the pressure and open the lid, checking the beans—they should be soft.
- Pour in the cream and add the garam masala. If you’re using canned beans, add them now.
- Simmer on saute mode for 5 minutes, stirring occasionally. Serve immediately with fresh cilantro.
TAGS: VEGETARIAN, SOUPS/STEWS
Empanadas
April 26, 2023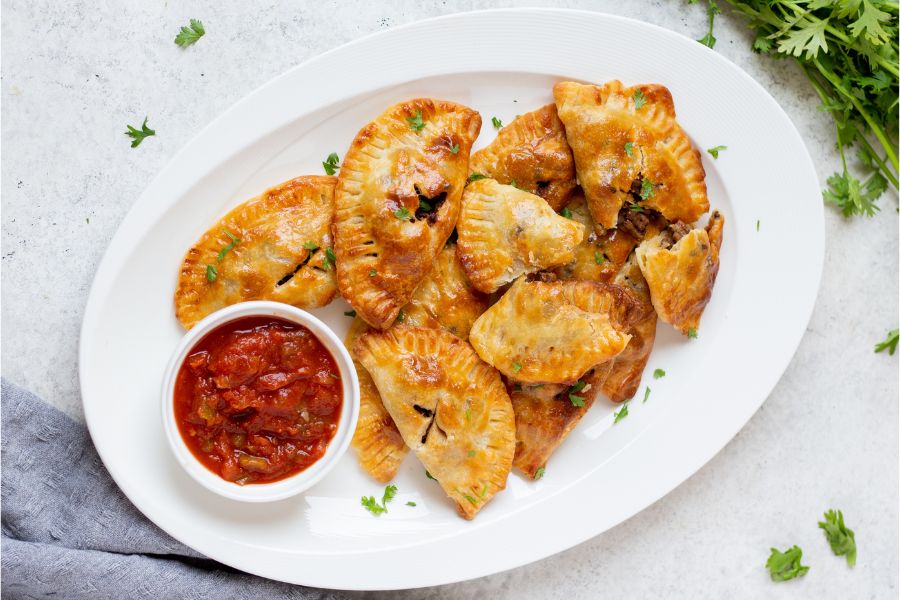
An empanada is a fried or baked hand pie, common across Latin and South America. Try this gluten-free recipe for lunch or dinner, or make enough to share as appetizers as your next get-together. Substitute the beef with beans and you have a vegetarian version!
This recipe is provided courtesy of the Gluten-Free Palate.
Ingredients
Dough
- 3 cups all-purpose gluten-free flour
- 1 teaspoon xanthan gum (omit if the flour already contains it)
- 1 teaspoon salt
- 1 cup unsalted cold butter, cubed
- 1 large egg
- ½ cup cold buttermilk
Filling
- 1 Tablespoon olive oil
- 1 onion, diced
- 1 lb ground beef
- 1 teaspoon dried oregano
- 1 teaspoon garlic powder
- 1 teaspoon paprika
- ½ teaspoon cumin
- ½ teaspoon salt
- ½ teaspoon black pepper
- 2 Tablespoons ketchup
- ½ cup shredded cheese of choice, like Colby-Jack, cheddar, mozzarella, or a mix
Egg Wash
1 large egg beaten with 1 Tablespoon of water
Instructions
- In a large mixing bowl add the flour, xanthan gum (if using), and salt. Whisk to combine. Add the cold cubed butter and use a pastry cutter or your hands to mix until the mixture resembles a coarse meal. Create a well in the middle.
- Add the egg and buttermilk to the well you just created in the flour. Gradually mix the egg into the flour using a fork. Mix until the dough thickens and forms a ball. Wrap tightly in a plastic wrap and allow the dough to rest for 30 minutes or so in the refrigerator while preparing the filling.
- Heat the olive oil in a frying pan over medium-high heat. Add the chopped onion and sauté for 5-6 minutes or until translucent.
- Add the ground beef, oregano, garlic powder, paprika, cumin salt, and pepper. Cook until the ground beef is browned all over. Drain the fat and return the mixture to the pan on medium heat.
- Add the ketchup and sauté for 2-3 minutes. Taste and adjust salt and pepper if needed. Mix in the shredded cheese and take the mixture off the heat. Set aside to cool.
- Preheat the oven to 350ºF and line a baking sheet with parchment paper. Remove the dough from the refrigerator and lightly flour a clean surface.
- Roll the dough into a thin circular shape. To make the small empanadas use a round cutter or a drinking glass with a 4-inch diameter to cut holes into the dough. You can use whatever size you want. Place the circle onto the baking sheet.
- Repeat step 7 with the remaining dough until no dough remains.
- Place about 1 Tablespoon of filling in the center of each circle. Brush some egg wash on one side of the circle, then fold over to create half a circle. Crimp the edges with a fork.
- With a small knife cut a small slit to let the steam escape.
- Brush the empanadas with egg wash and bake in the preheated oven for 20-25 minutes or until golden brown.
Alternative: Fried Empanadas
Instead of baking them, you can fry the empanadas in vegetable oil in a large frying pan. Fry them for 3-4 minutes per side or until golden brown and crispy.
PERMALINKTAGS: LUNCH, DINNER, APPETIZERS/SNACKS
Roti (Indian flatbread)
April 5, 2023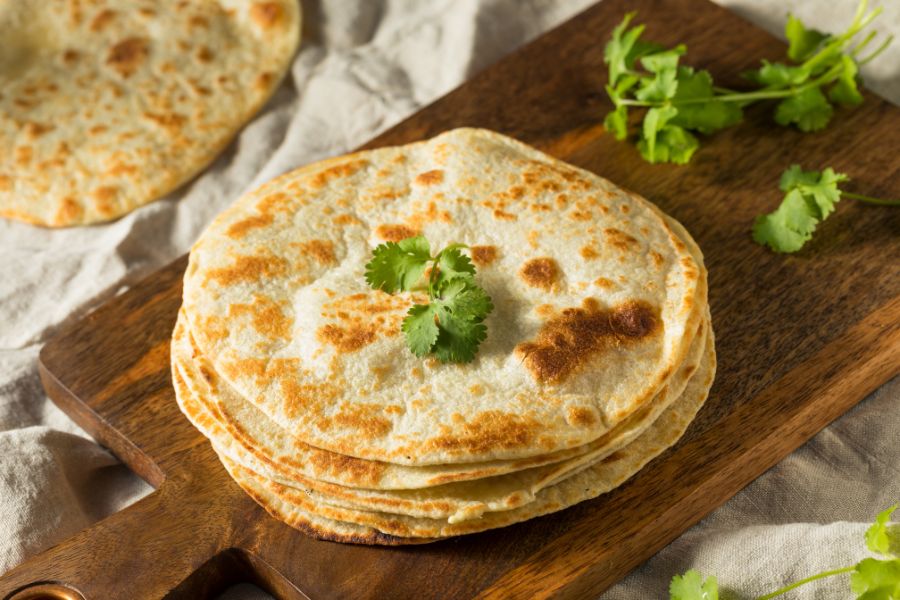
Roti is undoubtedly a staple of Indian cuisine, and it’s popular across all of South East Asia as well. They’re fairly easy to make, but traditionally contain wheat—we’re here to help! Try this gluten-free recipe with your next curry.
This recipe is provided courtesy of the Gluten-Free Palate.
Ingredients
Yields 6 servings
- ½ cup chickpea flour (also called besan or gram flour)
- ¼ cup cassava flour
- 1 cup gluten-free 1-to-1 flour
- 1 teaspoon xanthan gum
- ½ teaspoon fine sea salt
- 2 teaspoon baking powder
- 2 Tablespoon olive oil
- 2 ½ cups hot water
Instructions
- Place all of the dry ingredients in a medium-sized bowl: chickpea flour, cassava flour, gluten-free plain flour, xanthan gum, fine sea salt, and baking powder. Mix well using a whisk or wooden spoon.
- Add olive oil. Pour hot water a little at a time. Mix well using a wooden spoon until you can form it into a dough ball. The dough should be soft and firm but not too sticky—you probably won’t need to use all the water.
- Slice the dough into 6 pieces and then roll each piece into a small ball. Place them in the bowl and cover with a damp cloth.
- On a flat, floured surface, lay one of the dough balls and start to roll it until really thin. Make it as round as you can.
- Once you have rolled and shaped all the dough, heat a cast iron grill pan until hot.
- Place a roti circle onto the hot pan and leave to cook until you just start to see bumps appearing on the surface. Now flip the flatbread using a silicone spatula.
- Using a clean kitchen towel, press down very lightly for a few seconds to help the inside cook quickly, and then allow the bread to cook. After a few times, the roti starts to puff up. At that point, remove from heat and let the bubble deflate naturally.
- Enjoy roti with curry while hot!
TAGS: DAIRY-FREE, BREADS
Cheese Crackers
February 22, 2023You only need five ingredients to make the best ever gluten-free cheese crackers that taste like a name-brand treat! They’re exactly what a cracker should be: crunchy and salty. This recipe is provided courtesy of the Gluten-Free Palate.

Ingredients
- ¾ cup all-purpose gluten-free flour
- ¼ teaspoon xanthan gum
- 1 ½ –2 cups shredded cheddar (about 6-8 oz)
- For different flavors, use different cheeses. These photos were taken using a sharp cheddar. For a white cheddar, use white cheddar cheese.
- 4 Tablespoons butter, cold and cut into 1 inch pieces
- Extra salt for sprinkling (optional)
Instructions
- Preheat your oven to 350ºF. Line a baking sheet with parchment paper; set aside.
- In a food processor, pulse the gluten-free flour blend and xanthan gum. Add the butter pieces and cheese.
- Pulse together until it forms a ball (about 2 minutes).
- Place the ball between two pieces of wax paper, and roll it out to about ¼” to ⅛” thick.
- Using a pastry wheel or pizza cutter, cut into 1-inch shapes/squares.
- Carefully peel them and place on a parchment lined baking sheet about ½-inch apart.
- Poke each cracker with a fork to prevent over-puffing.
- Sprinkle with salt, if desired.
- Bake for 12-15 minutes or until lightly browned on the edges. Cool on the baking sheet, and store in an airtight container.
TAGS: APPETIZERS/SNACKS, VEGETARIAN, FOR KIDS
Showing 1-10 of 944
1 2 … 94 95 >